
You can type the Apple logo on Windows or Mac notebooks and computers in several different ways: by locating the logo in Windows’ character map, using a Windows shortcut (typing “F000” and then pressing Alt + X), via a quick stroke of a few keys on Mac (holding down down ⌥ Option + ⇧ Shift + K) or with a replacement shortcut on Mac. This tutorial will cover each of the four methods in detail, thereby equipping you to type the logo in Windows and iOS operating systems alike. Interested in inserting an into your text? We have you covered.
StepsMethod 1Method 1 of 4:Using Windows’ Character Map
1Open the Character Map. Begin by accessing the Start menu and then selecting Programs/All Programs. Then click Accessories and select the System Tools folder.XYou can also access the Character Map from the Run window. Simply press ⊞ Win + A so that the Run window appears and then type “charmap.” Once typed, press ↵ Enter.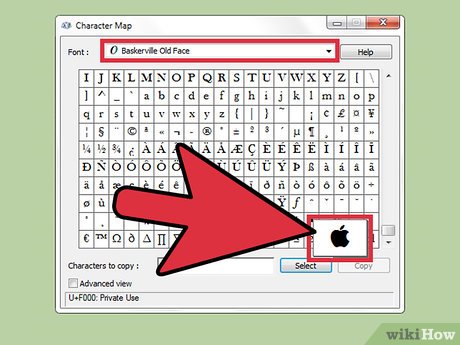
2Locate the Apple logo. First, click on the Font dropdown list. Scroll to the “Baskerville Old Face” font and select it. Then scroll down its list of characters and locate the Apple logo.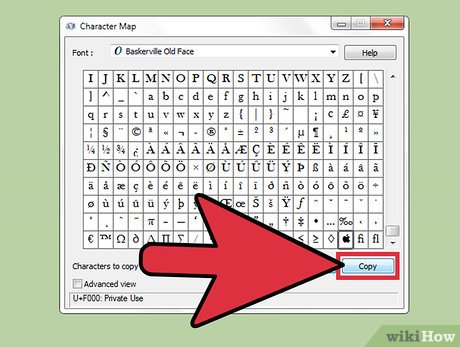
3Copy the Apple logo. After clicking on the logo, then hit the Select button next to the “Characters to copy:” text. Finally, click on the Copy button next to the Select button.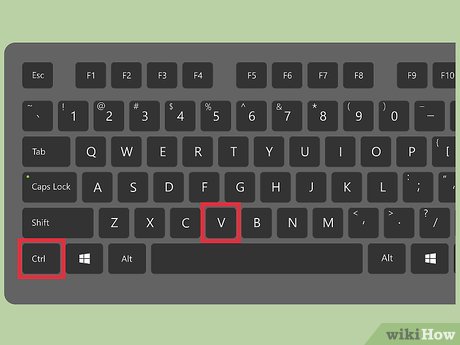
4Paste the Apple logo. Simply find the place in which you’d like to insert the logo and press Ctrl + V in order to paste it. Alternatively, you might right-click your mousepad and select Paste.Method 2Method 2 of 4:Using Windows’ Unicode
1Locate the destination for your Apple logo. You can place one in any text field that allows editing. Place your cursor wherever you intend the logo to go.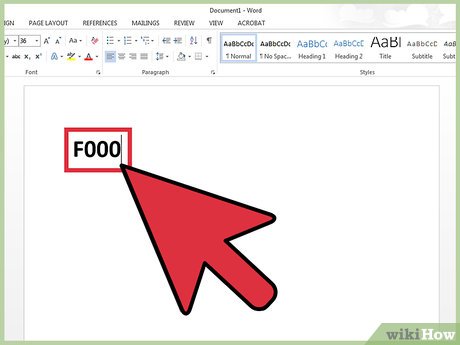
2Type the Windows’ character code: F000. This code is allows users to quickly insert special characters from the character map. Simply type “F000” wherever you’d like to insert the Apple logo.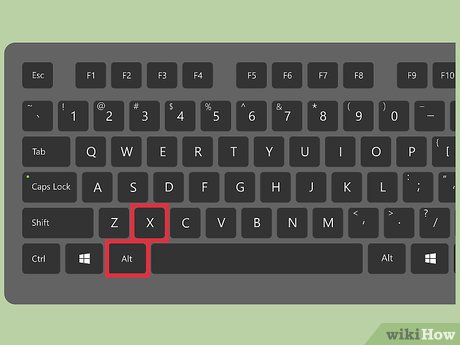
3Replace the character code with an Apple logo. After typing “F000,” press Alt + X at the same time. You’ll see the logo appear immediately. Some may find this method significantly more efficient than working via the Character Map.Method 3Method 3 of 4:Using Mac Keyboard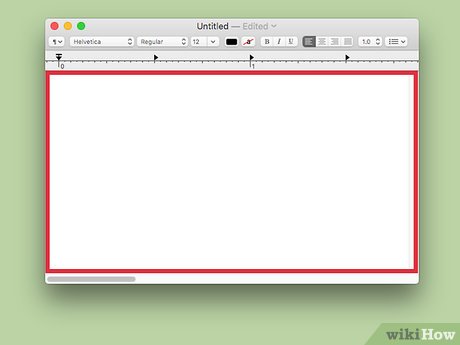
1Locate the destination for your Apple logo. You can place one in any text field that allows editing. Place your cursor wherever you intend the logo to go.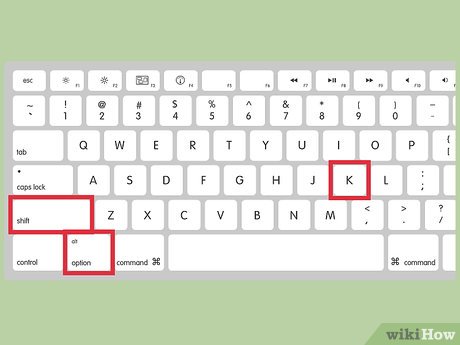
2Type the Apple logo using your keyboard. Hold down ⌥ Option + ⇧ Shift + K simultaneously. This will cause the Apple logo to be immediately inserted.Method 4Method 4 of 4:Using Preferred Mac Shortcut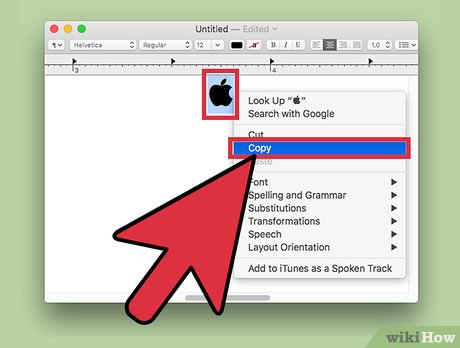
1Copy the Apple logo. To do so, you must have first inserted the logo by pressing ⌥ Option + ⇧ Shift + K as detailed in the previous method. After typing the logo into a text field, highlight it and press ⌘ Command + C (or right-click your mousepad and select “Copy”). You can also consult typing an Apple icon for further details.Note that this method isn’t radically different from using Mac’s built-in key combination. It will simply allow you to adjust which combination of keys is associated with the Apple logo, potentially making the process easier depending on a user’s preferences.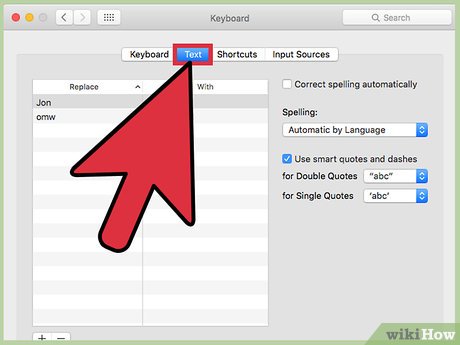
2Access the Text section in System Preferences. Begin by opening System Preferences from your Dock or the Applications section of Finder. Then select Keyboard and click on the Text tab.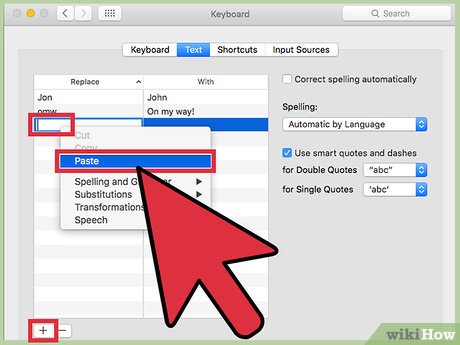
3Add a shortcut for the Apple logo. First click on the plus symbol (+) near the bottom of the window. Next, add your preferred keyboard shortcut under the “Replace” field and paste the previously copied Apple logo next to it in the “With” field. You may paste either by pressing ⌘ Command + V or by right-clicking your mousepad and selecting “Paste.” Finally, close System Preferences, and you’ll now be able to insert the Apple logo using your key combination of choice.


