
This wikiHow teaches you how to restore items in the trash folder back to their original location on a Mac computer. Once the trash has been emptied, you cannot recover the contents of the trash.
Steps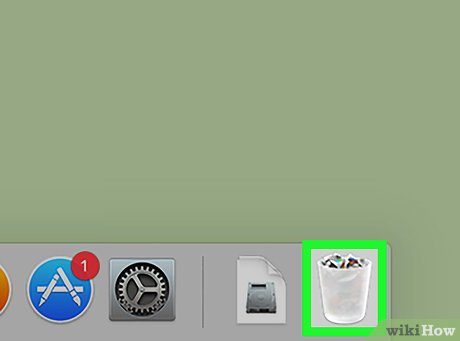
1Open the trash folder on your Mac. Click the white trashcan icon on your Mac’s dock at the bottom of the screen. When the trash appears full, this indicates the trash has files in it.
2Click Edit. It’s in the menu bar at the top of the screen.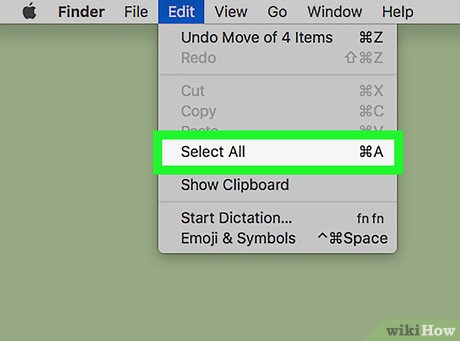
3Click Select All. It’s at the bottom of the second section of options in the drop-down menu.You can also select all by pressing ⌘ Command+A instead.If you don’t want to select every file, hold ⇧ Shift and select only the files you want to restore.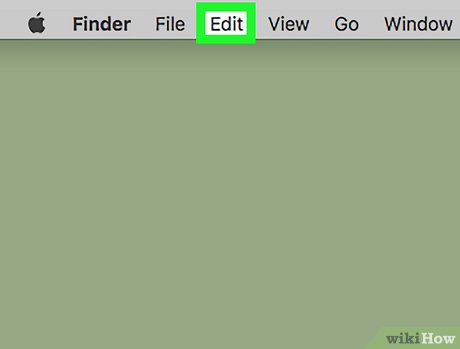
4Click File. It’s in the menu bar at the top of your Mac’s screen. This opens a drop-down menu.
5Click Put Back. This will return all the selected files in the trash to their original location. Once the trash has been emptied, the files cannot be recovered.You can right-click on an item and select “Put Back” to put back all the selected items in the trash. If you are using a trackpad or a Magic Mouse, you can right-click by doing a normal click with two fingers.


