
When designing your website, it’s important to make sure it looks great on any device, regardless of screen size and shape. Responsive websites are designed to look good on all sorts of modern devices like computers, phones, tablets, TVs, wearables, and even car screens. To make a website responsive, you’ll need to modify your CSS and HTML code to automatically resize its elements depending on specific conditions. This wikiHow teaches you how to plan and implement basic responsive web design.
StepsMethod 1Method 1 of 3:Planning Responsive Design
1Find out how your audience uses your website. These days, the majority of people browsing the web do so from mobile phones and tablets.X For a site to be responsive, you must ensure that it displays properly no matter where it’s being viewed. If time and money are of the essence, focus on the types of devices that are most popular with your users (if this information is available) and how they use your site. Using your analytics software or some other form of research, find out: What sorts of devices they use most often to view the website, paying special attention to mobile phone/tablet/computer brands and screen/resolution sizes.What browsers are most popular with your users. As far as global statistics are concerned, Google Chrome is the most popular web browser worldwide, but Safari is a close second.XHow your visitors use your website, such as how much time they spend viewing it, where they’re viewing it, and which content is most popular. This can help you determine which type of content is important to include and which can be omitted.
2Design different layouts for different devices. You can use a combination of CSS and JavaScript to detect a user’s device, as well as its capabilities (whether it supports Java, Flash, etc.,) and display a particular version of your site accordingly. CSS Media Queries are particularly useful for determining the size/resolution of the device. 
3Account for different types of interactions. Your visitor could be interacting with your website using a mouse, a keyboard, a touchscreen, or even a screen-reader for visually-impaired people. Considering this, your website should respond to mouse clicks, keyboard keys (Tab, Enter, Return, etc.,) and screen finger-touches. Hover-over effects do not work with anything except for a mouse. Instead of using these effects, you could use require the visitor to click a button or icon to display whatever was previously displayed on a mouse hover.
4Consider using a Content Management System (CMS). An easy way to ensure your site design is responsive is to use a CMS with a pre-built responsive theme. Using a CMS like Joomla, Drupal, or WordPress allows you to ensure your website looks great on all devices without having to code the responsive elements yourself.X Check with your webhosting provider to see which CMS tools are available with your service. 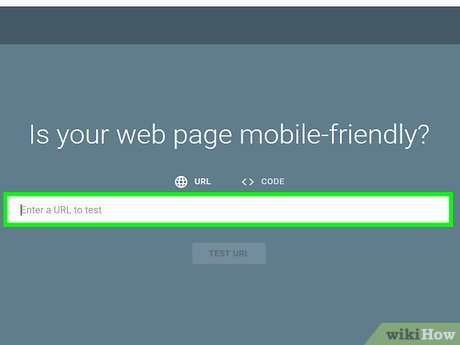
5Use online tools to test your website. Now that responsive web design has increased in popularity, there are a variety of free tools you can use to test your website. If you’ve already coded your website, use these tools to test how it looks in various conditions so you’ll know where you need to improve responsiveness: Mobile-Friendly Test by Google: Lets you know whether your site works as well on mobile devices as it does on computer screens.resizeMyBrowser: Lets you view your site in different resolutions.Responsiator: Displays your site on different device screens in different layouts (sideways or right-side-up).Method 2Method 2 of 3:Making the Page Layout Responsive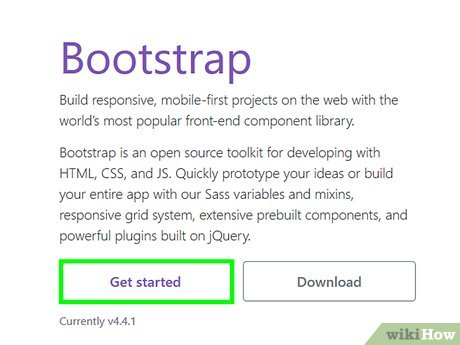
1Consider a free responsive style sheet framework. A framework is a pre-written set of HTML, CSS, and/or JavaScript that you can use as a skeleton for your site. Frameworks are all tested and optimized to work with all browsers, so all you’ll need to do is insert your content, add your media and color preferences, and publish your site. Some popular frameworks are: BootstrapSkeletonFoundation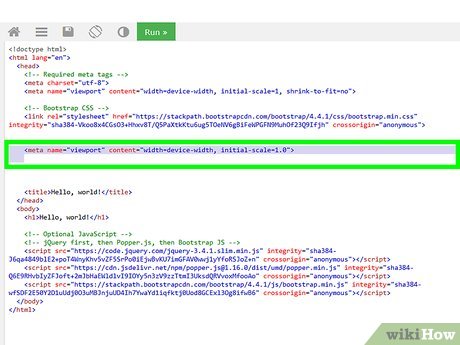
2Set the viewport with a meta tag. If you’re not using a framework, you’ll want to start with the most important aspect of coding a responsive website: the Viewport. The viewport is the part of the website that’s visible to the user.X The key to making your site display properly regardless of screen size is to scale the viewport size in the META tag. To do so, include this tag at the top of each page on the site: <meta name=”viewport” content=”width=device-width, initial-scale=1.0″>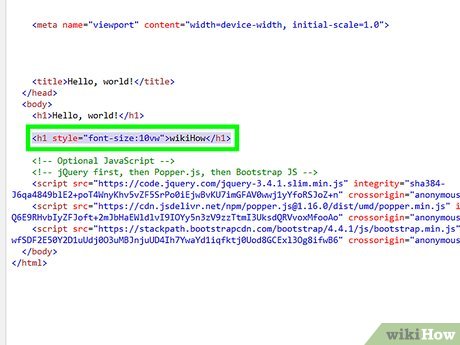
3Specify the text size in relation to the viewport. Once your viewport is set, the text on your page will scale to fit the screen. However, fonts may display too large or too small if their sizes aren’t specified in relation to the viewport. You can do this by defining the font size as a specific percentage of the viewport with the vw unit. This example tells the H1 headers to display at 10% of the viewport’s width, no matter its size: <h1 style=”font-size:10vw”>wikiHow</h1>
4Use media queries to show different styles for different screen sizes. Media queries allow you to choose whether to display certain CSS elements depending on screen size. You can specify the specifics of your media query in your CSS file. In this example, the body’s background color will turn red if the user’s screen size is 480px or larger:X<h1 style=”font-size:10vw”>wikiHow</h1>@media screen and (min-width: 480px) }Method 3Method 3 of 3:Making Images Responsive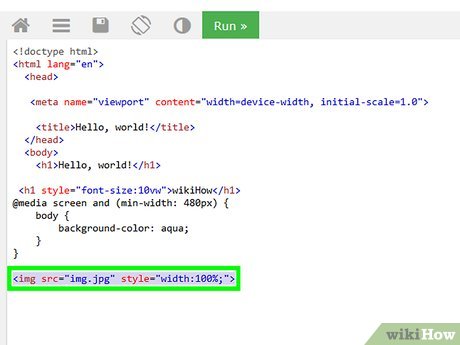
1Use the CSS width property to scale images. Rather than setting the width of the image to a specific amount of pixels (e.g., 500px), use a percentage (e.g., 100%) so that the image looks at the width of its parent and adjust accordingly.X Setting an image’s width to 100% forces the image to scale up and down depending on the size of the viewer’s screen. To do this in-line: <img src=”img.jpg” style=”width:100%;”>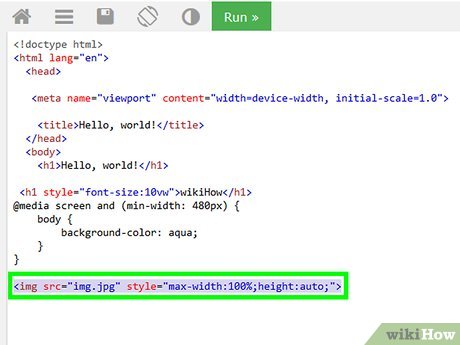
2Use the max-width property to limit scaling the image’s actual size. If you use the width property in the previous step to scale an image to 100%, the image will grow or shrink to fit 100% of its container no matter the size. This means that if the image is on the smaller side, it will scale up larger than its original size and look of lesser quality. To prevent this from happening, use max-width to set the image’s maximum scaling size to 100% (its actual size). Here’s how: <img src=”img.jpg” style=”max-width:100%;height:auto;”>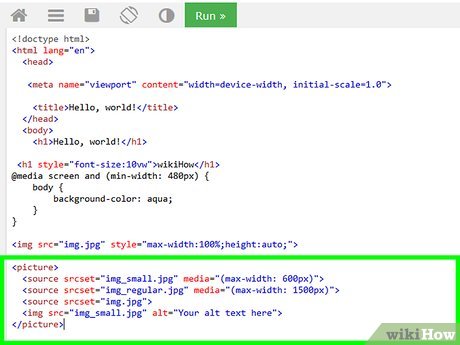
3Use the HTML picture element to display different images on different screen sizes. If you want to create custom-sized images to display on different sized screens, you can specify which photos to display in your HTML code. Create the different sized images, and then use this code as an example for specifying which image to use on 600px and 1500px width screens: <picture> <source srcset=”img_small.jpg” media=”(max-width: 600px)”> <source srcset=”img_regular.jpg” media=”(max-width: 1500px)”> <source srcset=”img.jpg”> <img src=”img_small.jpg” alt=”Your alt text here”></picture>


