
In Pro Tools, the term “master track” can refer to a couple of different things. Some refer to all tracks as the “master tracks,” but master track most commonly refers to the master fader track. The master fader track is the track that all tracks are mixed to before the track is rendered or sent to your speakers. You can use the master fader track to control the volume of the overall mix, and you can also add effects such as compression or EQ to the track This wikiHow article teaches you how to create a new Pro Tools session and a master fader track in Pro Tools by Avid Technology.
StepsPart 1Part 1 of 5:Creating a New Pro Tools Session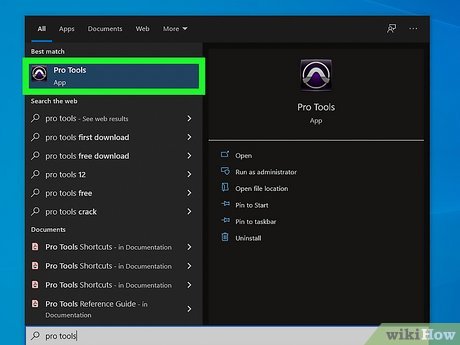
1Open Pro Tools. Pro Tools has an icon that resembles a circle with a bell curve in the middle. Click the icon to launch Pro Tools.You can download Pro Tools from Avid’s website. Pro Tools First is the free version of Pro Tools with a basic toolset. The full version of Pro Tools requires a subscription, which costs $29.99 a month. Pro Tools Ultimate is also available for $799.99 per year or $79.99 per month. A free trial of Pro Tools and Pro Tools Ultimate is available.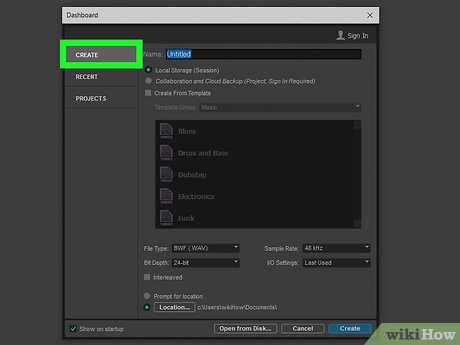
2Click Create. It’s in the lower-right corner of the dashboard that appears when you launch Pro Tools. This creates a new Pro Tools session.Alternatively, you can click Projects tab in the upper-right corner and then double-click an existing session to open it. Or you can navigate to the location of the save file in File Explorer or Finder and double-click the session save file (“.ptx” file) to open it.You can open or create a new session in Pro Tools at any time by clicking File in the menu bar at the top. Click Create New to create a new session or click Open Session to open an existing session.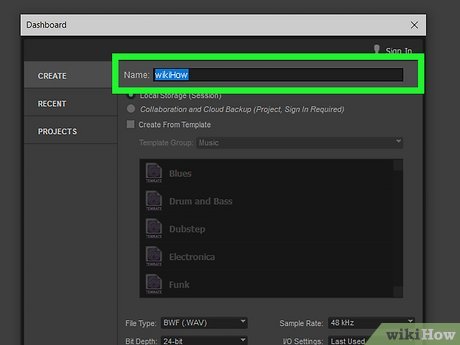
3Enter the name of your session. Use the text field next to “Name” to type the name of your session. This could be the name of your song, podcast, or whatever you are recording.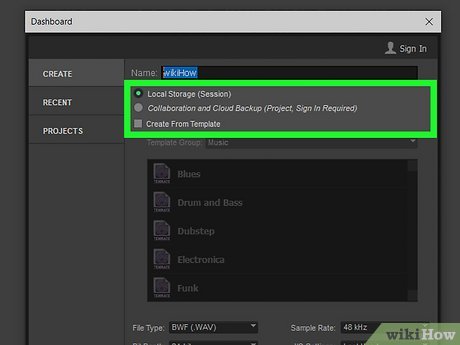
4Select “Local Storage (Session).” It’s the first radio option below the name of your session.Alternatively, you can select Collaboration and Cloud Backup to save your Pro Tools session to online storage that others you are collaborating with can access.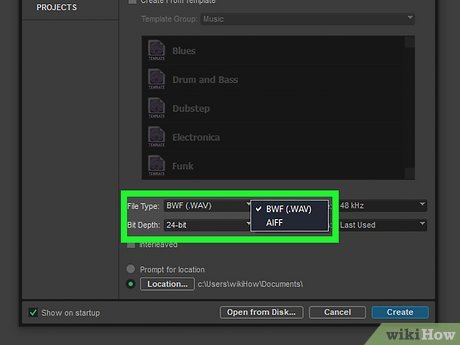
5Select the file type. Use the drop-down menu next to “File Type” to what file type you want your session tracks to be recorded in. You can select wave files (.wav) or audio interchange file format (.aiff). Pro Tools can use both file formats in one session, so don’t worry too much about what format you choose.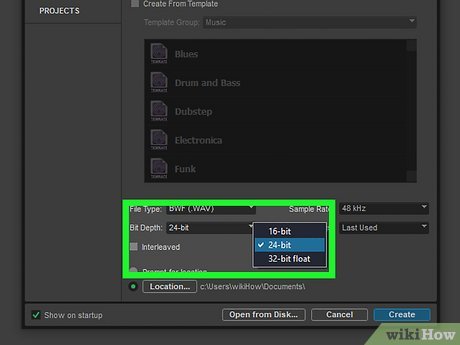
6Select your bit depth. Use the drop-down menu next to “Bit Depth” to select your bit rage. You can select “16-bit,” “24-bit,” or “32-bit.” Higher bit rates produce better quality audio, but also take up more storage space on your hard drive. 24-bit is suitable for most needs.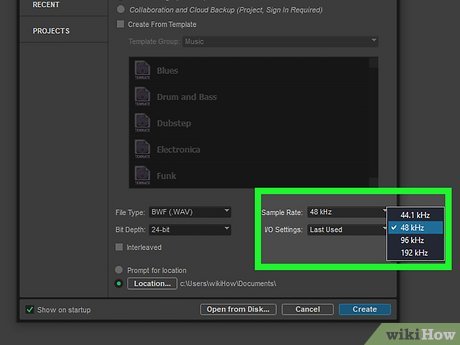
7Select your sample rate. Use the drop-down menu next to “Sample Rate” to select your sample rate. This is how many times per second the audio is sampled/recorded. You can choose between 44.1kHz and 192 kHz. 44.1 kHz is good for CD quality and 44.8 kHz is good for DVD quality.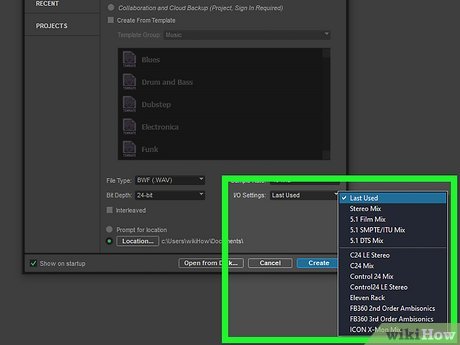
8Select your I/O settings. Use the drop-down menu next to “I/O settings” to select the settings Pro Tools uses for labeling and routing signals in and out of your audio interface. You can select “Presets” or “Last Used.”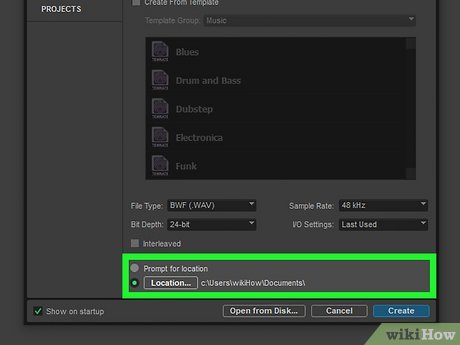
9Select a save location. If you want to save your session in a location other than the default, click Location at the bottom of the dialog box and select a folder you want to save the session too. Then click Open.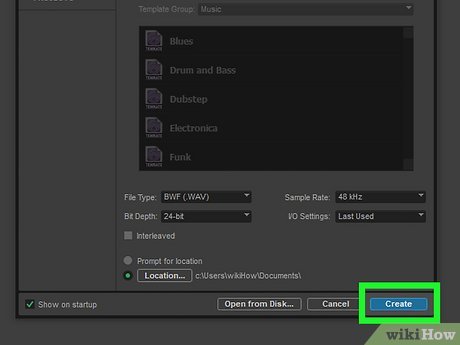
10Click Create. It’s in the lower-right corner. This creates a new Pro Tools session. A folder will be created in the location you selected that will contain all the tracks for your session.XPart 2Part 2 of 5:Creating a New Track
1Click Track. It’s in the menu bar at the top.
2Click New. This displays a sub-menu with items you can select.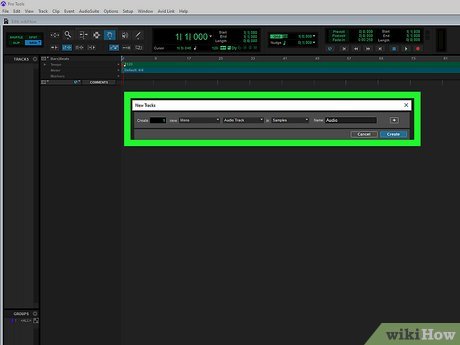
3Click Track. This opens the New Track dialogue box.Alternatively, you can create a new track by pressing Ctrl + Shift + N on Windows or Command + Shift + N on Mac.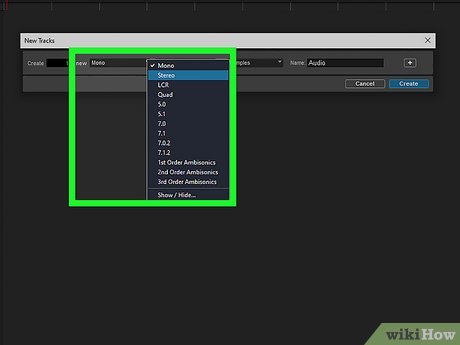
4Select the audio mode for the track. Use the first drop-down menu in the dialog box to select your audio mode. You can select “Mono,” “Stereo,” “LCR,” “LCRS”, “5.0,” and “5.1”.Mono tracks use a single wave file. They can be routed to an individual speaker or the same wave file can be routed to multiple speakers. Wave files are useful for instruments that only produce one sound.Stereo tracks have two separate wave files for the left and right speakers. This is useful when importing audio tracks or using an instrument that has a stereo mode.LCR tracks have three separate wave files that are routed to the left, right, and center speakers. This is useful for mixing tracks to the front in a surround sound mix.LCRS tracks have 4 separate tracks for the left, right, and center, as well as a single speaker in the back to create a surround sound feel.5.0 tracks have 5 tracks to create surround sound. These are speakers arranged to the left, right, and center, as well as a left and right speaker in the back.5.1 tracks are just like 5.0 tracks, only they have an additional track for the subwoofer. This is generally used for mixing movies.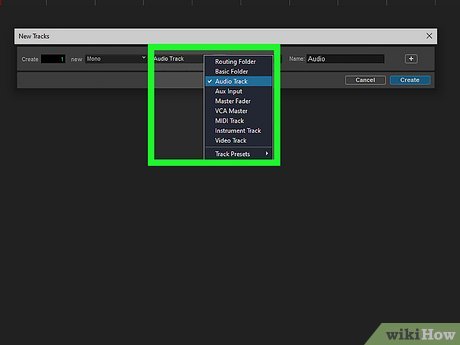
5Select a track type. Use the drop-down menu in the middle to select a track type. When adding a new track for the purposes of recording or mixing audio, there are generally four track types you can use. They are as follows:Audio Track: Audio tracks can be used to import or record audio in wave format. This is generally used for analog signals, such as microphones and electric guitars, or to import external audio files.MIDI Track: MIDI tracks are used to record MIDI files and MIDI instruments such as keyboards, electric drums, and other MIDI controllers. You can also import MIDI files to a MIDI track.Instrument Track: Instrument tracks are a combination of MIDI and audio tracks. They can carry wave files and MIDI files as well as record in both formats.Video Track: Video tracks can be used to edit audio from a video file.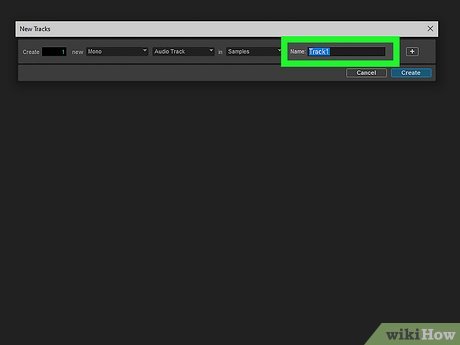
6Type a name for the track. Use the field next to “Name” to type a name for the track. It can be named after the instrument or a specific sound..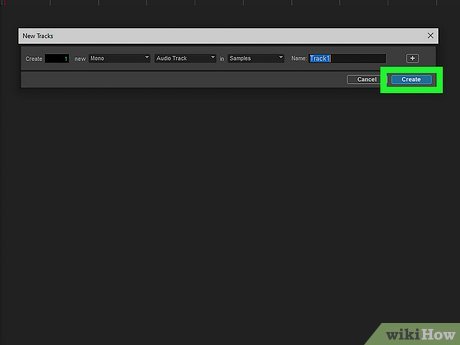
7Click Create. This creates a new track with the specifications you selected.X
8Switch to Mix Mode. Mix mode allows you to view the controls to all the tracks and make adjustments to the volume for each track as well as select the input and output (i/O) settings. Use the followings steps to switch to mix mode.Click Window in the menu bar at the top.Click Mix.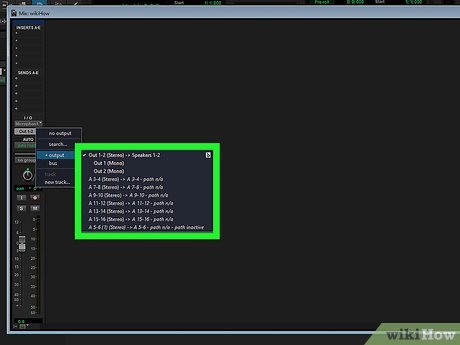
9Select the I/O settings. Use the drop-down menus below “I/O” on each track to select your input/output settings. The first menu at the top allows you to select which port on your audio interface that track will use to record. The second drop-down menu allows you to select which speaker(s) or fader track the track will send its audio to. Part 3Part 3 of 5:Adding a Master Fader Track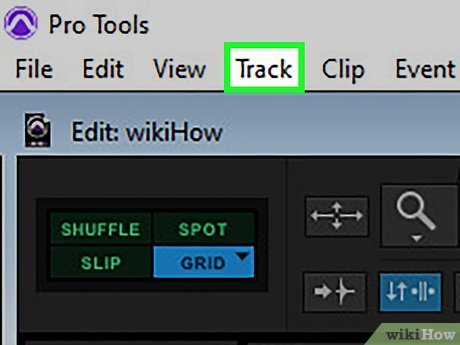
1Click Track. It’s in the menu bar at the top.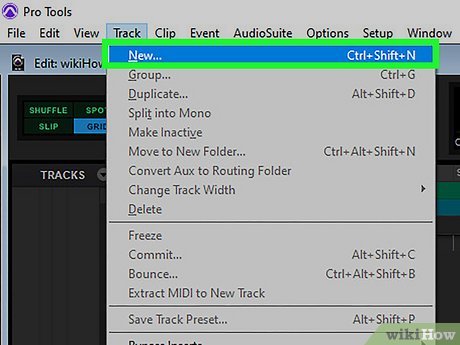
2Click New. This displays a sub-menu with items you can select.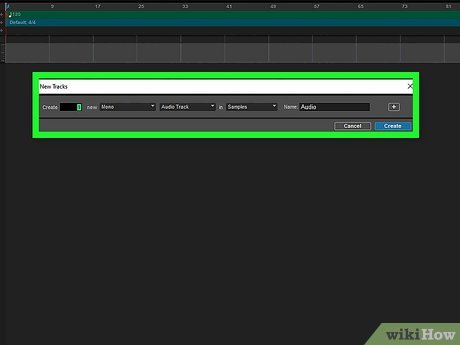
3Click Track. This opens the New Track dialogue box.Alternatively, you can create a new track by pressing Ctrl + Shift + N on Windows or Command + Shift + N on Mac.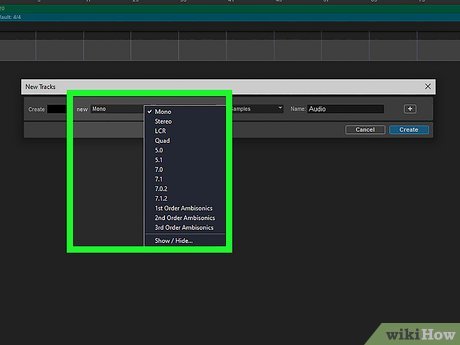
4Select your audio output mode. Use the first drop-down menu in the dialog box to select the overall channel output mode for your session. If you are recording a song in stereo mode, select “Stereo”. If you are mixing audio for a movie in 5.1 surround sound, select 5.1 audio. If you are recording a mono recording for one speaker, select “Mono”.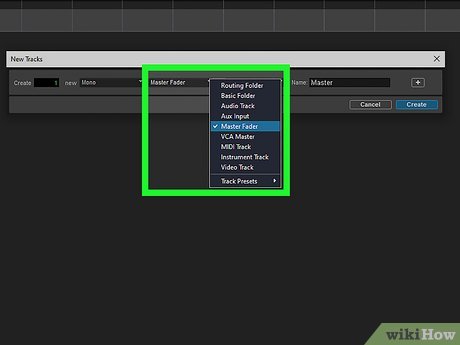
5Select “Master Fader” as the track type. Use the drop-down menu in the middle to select “Master Fader.” A master fader track allows you to adjust the volume level for the entire mix, as opposed to just one track. You can also apply effects such as EQ or compression to the master fader track and this applies the effect to the entire mix.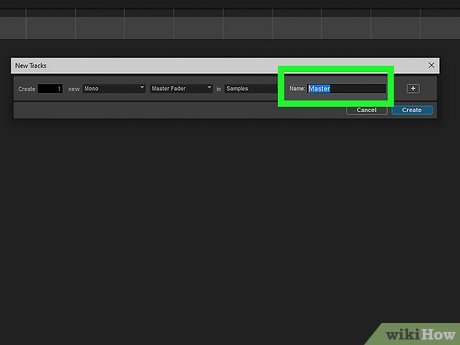
6Enter a name for the track (optional). If you want to give the track a new name, enter it in the field next to “Name.” Otherwise, leave it as “Master”.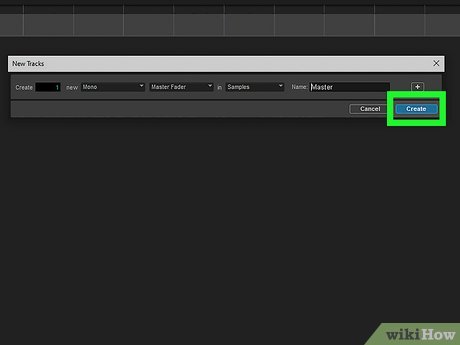
7Click Create. It’s in the lower-right corner of the dialog box. This creates a new master fader track to your output.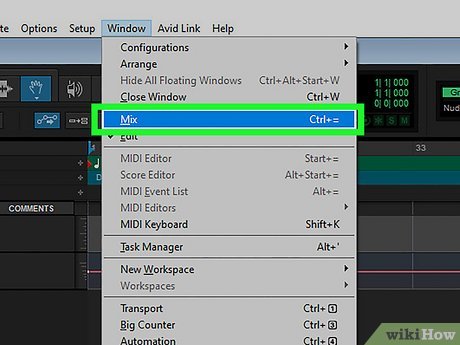
8Switch to Mix mode. Use the following steps to switch to Mix mode:Click WindowClick Mix.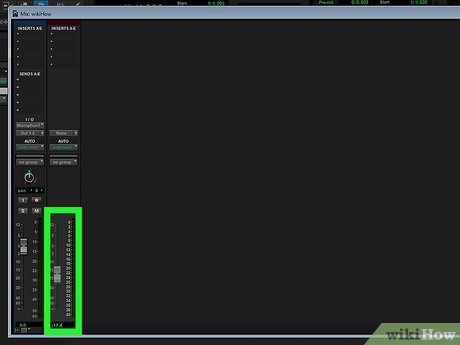
9Click and drag the slider bar in the master fader track. This adjusts the volume for the entire mix.XPart 4Part 4 of 5:Importing and Recording Audio to a Track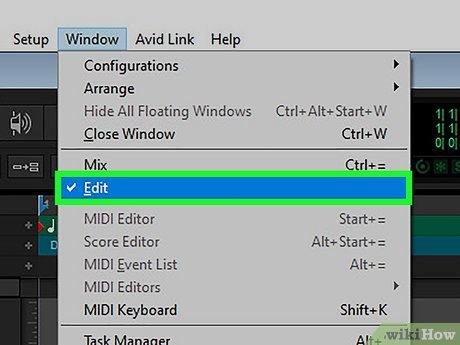
1Switch to Edit mode. Edit mode allows you to view and edit the waves files and MIDI files in each track. Use the following steps to switch to Edit mode:Click Window in the menu bar at the top.Click Edit.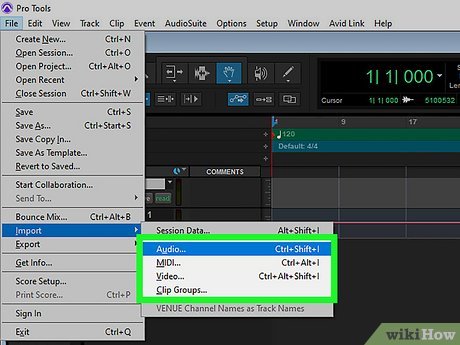
2Import an audio file into your master track. If you already have an audio file created, you can import it to your track by dragging and dropping the audio file into the track. Make sure you drop audio files into audio or instrument tracks, and MIDI files into MIDI or instrument tracks. You can also use the following steps to import audio or MIDI files:XClick File in the menu bar at the top.Click Import.Click Audio, MIDI, or Video.Navigate to the files you want to import.Click the files you want to import.Click Done or Open.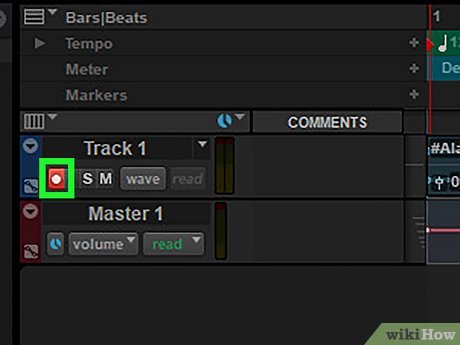
3Arm the track you want to record on. Arming a track enables recording for that track. You can record on multiple tracks at one time. To arm a track, click the record button on that track. It’s the button that has a large circle on it.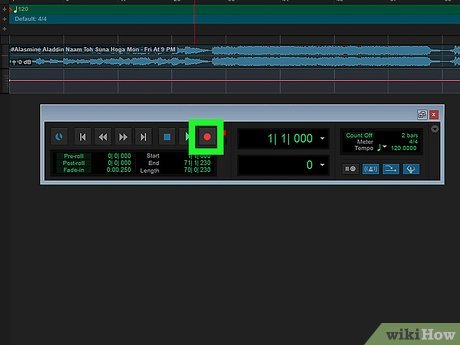
4Click the record button in the Transport window. The Transport window is the window that has all the playback controls. Click the record button in the Transport window to ready recording on the armed tracks. It’s the button with a large circle in the middle. The record button will flash to indicate that it is ready to record.If you don’t see the Transport window, click Window in the menu bar at the top. Then click Transport.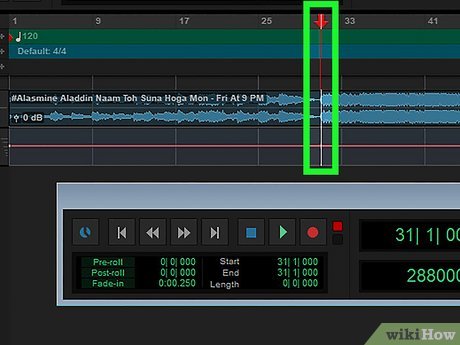
5Move the playhead to where you want to start recording. While in Edit mode, click where you want to start recording in the timeline. The time is displayed in seconds at the top of the timeline.Alternatively, you can click the button that resembles a triangle with a line pointing to the left to return the playhead back to the beginning of the track.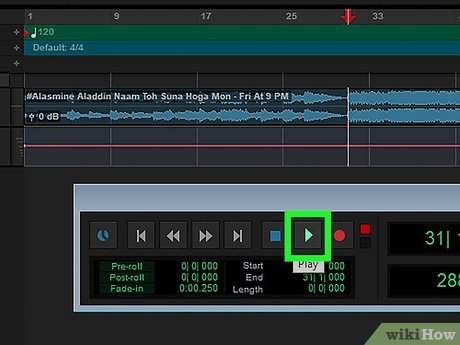
6Click the Play button. It’s the button that has an icon that resembles a triangle in the transport window. This starts playing the playback as well as recording on all armed tracks. #*Alternatively, you can start playing by pressing the Spacebar on the keyboard.7Click the Stop button to stop recording. To stop recording, click the button that resembles a square in the transport window to stop recording. Alternatively, you can press the Spacebar to stop recording.X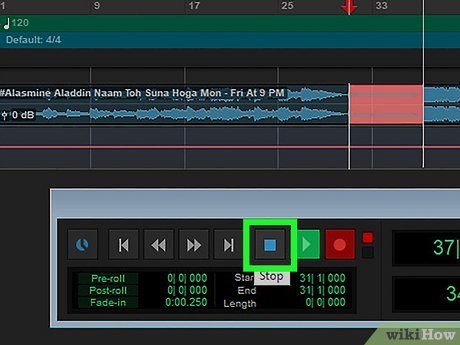
Part 5Part 5 of 5:Saving Your Session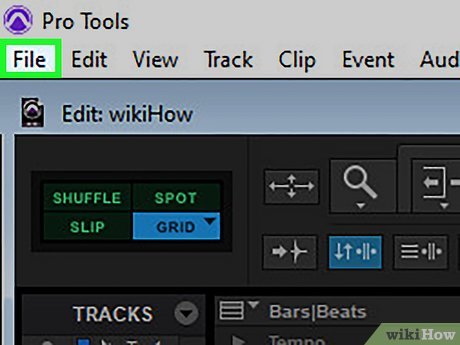
1Click File. It’s the first option in the menu bar at the top. When working in Pro Tools, it’s important to save often. This prevents loss of work in the event the program crashes or you have to shut down your computer for some reason.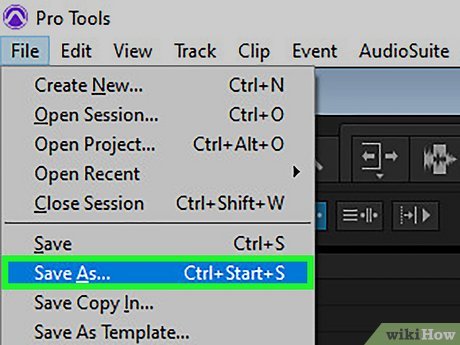
2Click Save As. This displays a dialog box that allows you to save your session under a specific name.If you’ve already saved your session under the name you want, you can just click Save.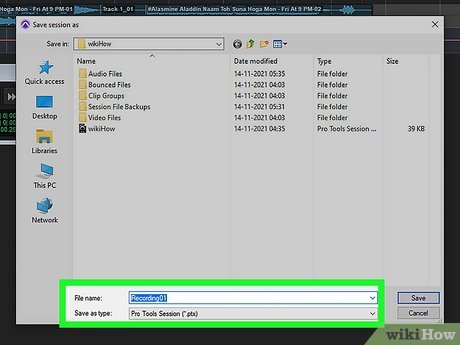
3Enter a name for your session. Use the field next to “Save as” to enter a name for your session.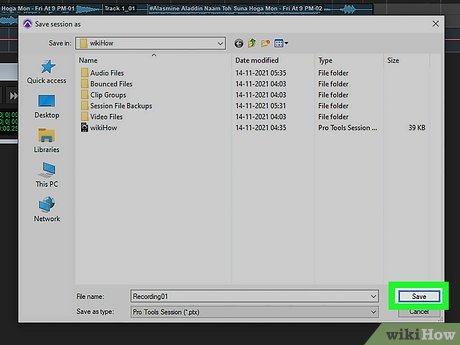
4Click Save. It’s in the lower-right corner of the dialog box. This saves your session.You can save at any time by pressing Ctrl + S on Windows or Command + S on Mac. It is suggested that you do so often.


