
The Google App Engine is a Platform as a Service by Google. With App Engine, there are no servers for you to maintain. You simply upload your application and it’s ready to go. This article is for anyone who knows a little bit of web development and want to create a web application which is live and accessible to all. This tutorial uses Java Plugin of Google App Engine and Eclipse IDE.
StepsPart 1Part 1 of 4:Setting up the Environment
This procedure installs the Google Plugin for Eclipse and optionally the Android Developer Tools, the Google Web Toolkit SDK, and the Google App Engine SDK.
1Start Eclipse, running JVM version 1.7.0 or later.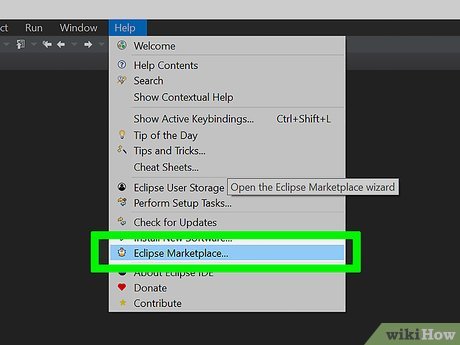
2Select Help > Install New Software.
3In the dialog that appears, enter the update site URL into the Work with text box: “https://dl.google.com/eclipse/plugin/4.3”. Press the ↵ Enter key.
4Select the checkbox next to Google Plugin for Eclipse (required). Click Next.
5Review the features that you are about to install. Click Next.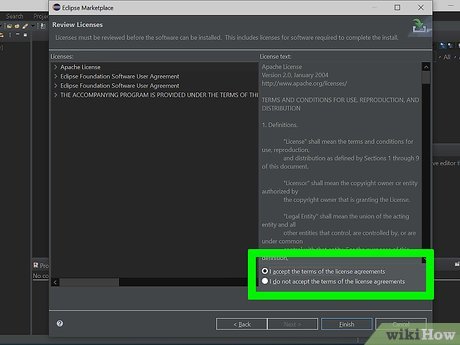
6Read the license agreements and then select “I accept the terms of the license agreements”. Click Finish.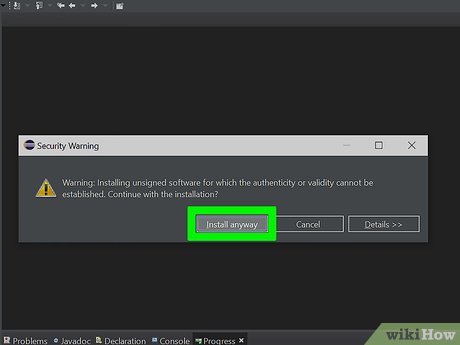
7Click OK on the Security Warning.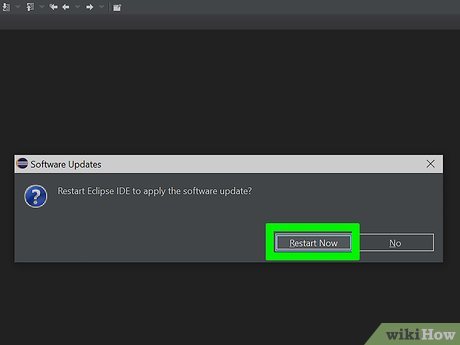
8Click Restart Now to restart Eclipse.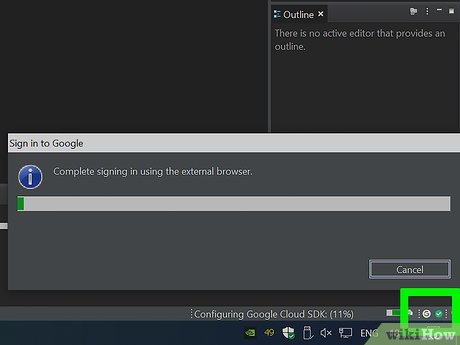
9Sign in to Google by clicking in bottom-right corner.Provide the Google Account Credentials and Click Sign in.Click ‘Accept’ after reading the required permissions.Now you are logged in to your Google Account.You are ready to build App Engine web applications and mobile backends for your Android applications!Part 2Part 2 of 4:Creating the Application in GAE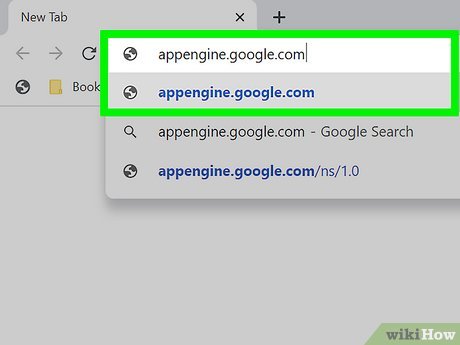
1Go to appengine.google.com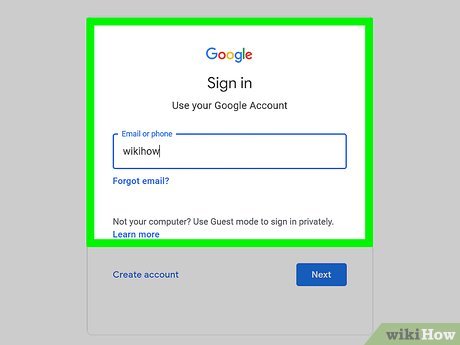
2Login to your account using google account credentials .A new page is opened where it displays all the google app engine applications created by you.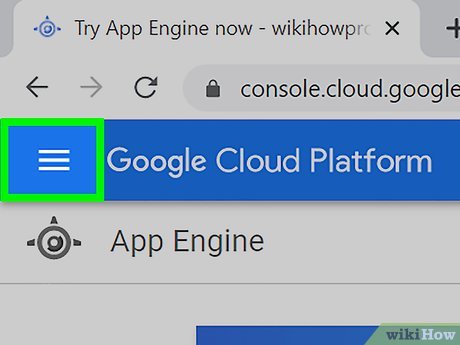
3Click ‘Google Developers Console’ link. A new window opens.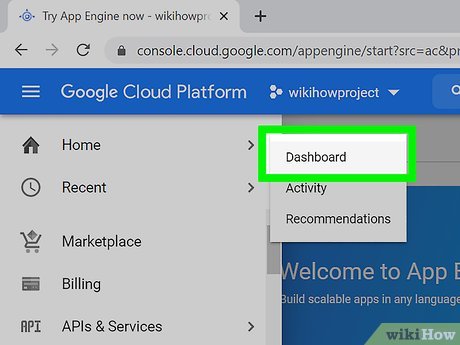
4Google Developers Console is opened.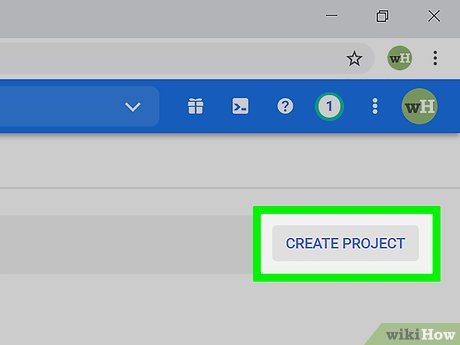
5Click ‘Create new Project’.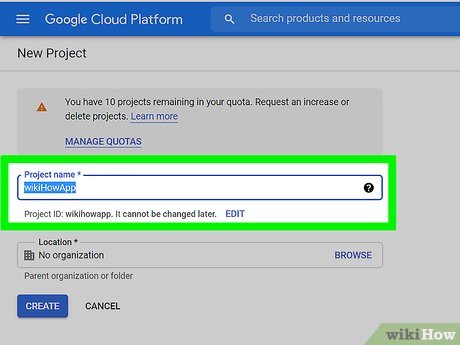
6Enter the project name and edit the app ID as desired but it must be unique. An error is shown if the app id is not available.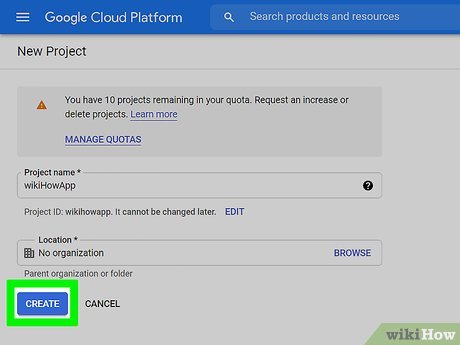
7Click Create. Your newly created app is ready. Now you can deploy the java web app code to this app id.Part 3Part 3 of 4:Creating the Application in Eclipse
1Open Eclipse. Go to File > New > Web Application Project.
2Enter the project name and package name. Uncheck the Google Web Toolkit.
3Click Finish.Your project folder and its internal hierarchy will be created as shown in the figure.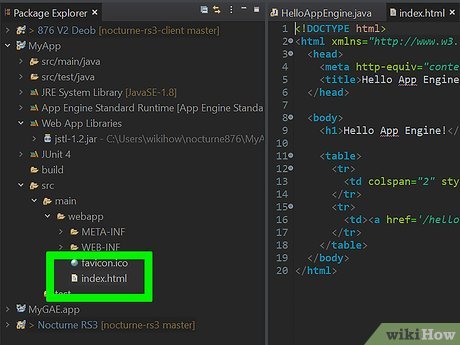
4Open index.html which is present in the war folder of your project.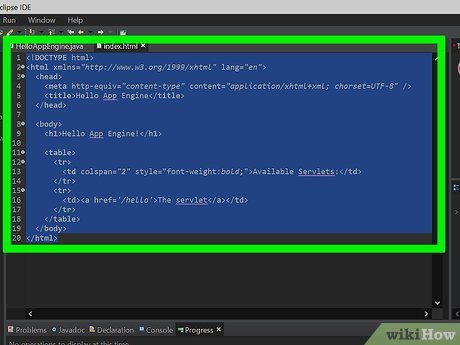
5Edit the HTML as desired. Currently we are not using any servlet hence remove the servlet link from the html.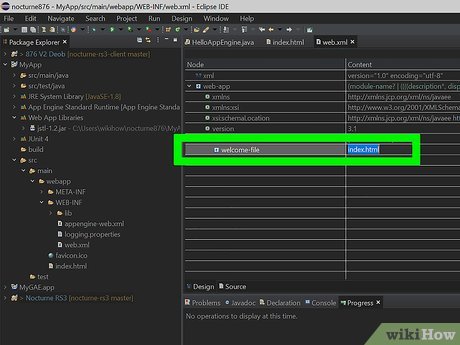
6Open web.xml and make sure that index.html is set as the welcome file.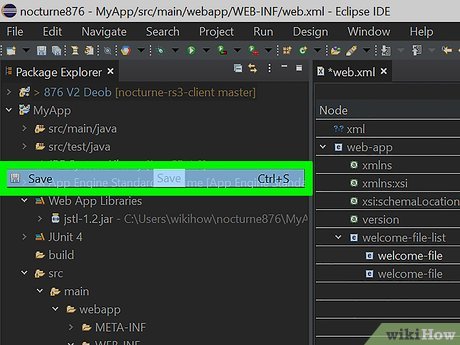
7Save the project.Part 4Part 4 of 4:Deploying the App to Google App Engine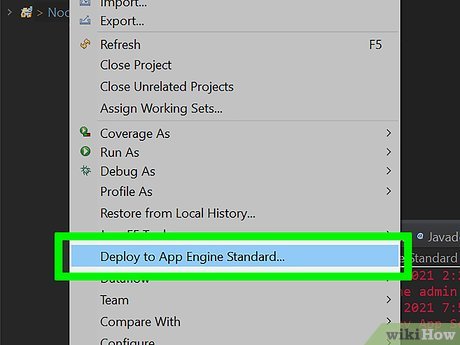
1Right click on the project name in the package explorer. Go to Deploy > Google #App Engine. A window will pop-up.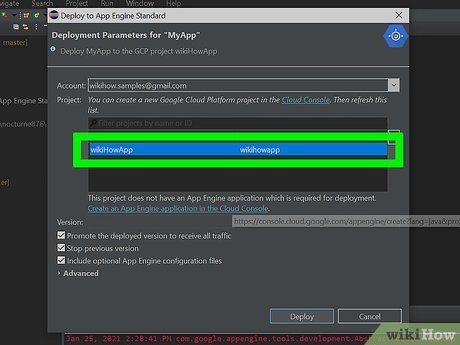
2Click on the ‘Application Settings’ link. A new window will pop-up.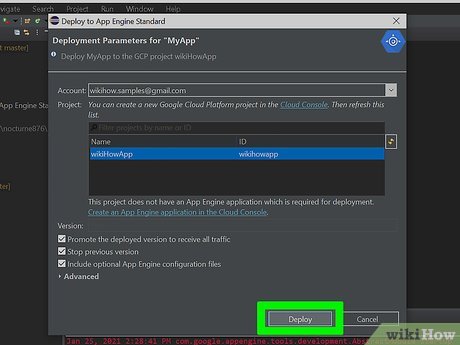
3Enter the App ID which you previously created and click OK. Click Deploy.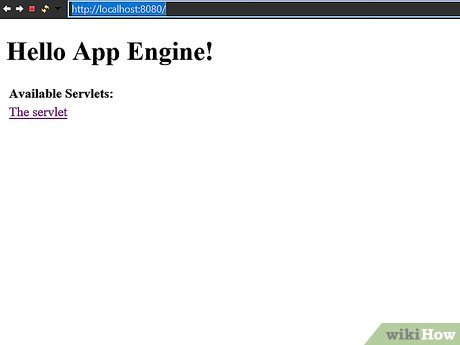
4After the app is deployed, it will open in the browser automatically. The app will be available at www.app-id.appspot.com.


