
Desktop shortcuts are the shortcuts of a particular file present inside the complex folders and drives on the computer. Through desktop shortcuts, applications can be opened easily just on a click. Desktop shortcuts reduce the need to access your applications from the original file location and thus saving your precious and valuable time. Here are the steps to create desktop shortcuts:
StepsMethod 1Method 1 of 2:Using the Desktop Menu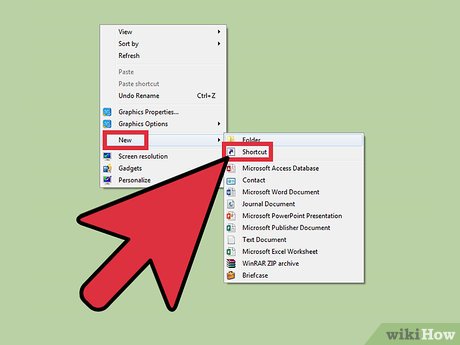
1Right-click anywhere in the free space present on your desktop. Point to New option from the dialog box.This will redirect you to another dialog box. From there, choose the Shortcut option.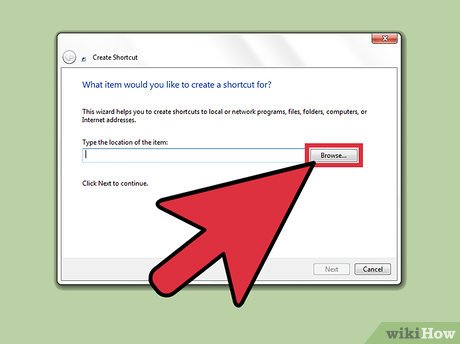
2Look for a new window asking you to browse the location of the file for which you want to create the shortcut. You must choose the browse option and browse the file location. As soon as you choose the location, the box will be filled itself by the location.You can also type the address of the file but it is always better to choose the location as it minimizes the probability of mistakes.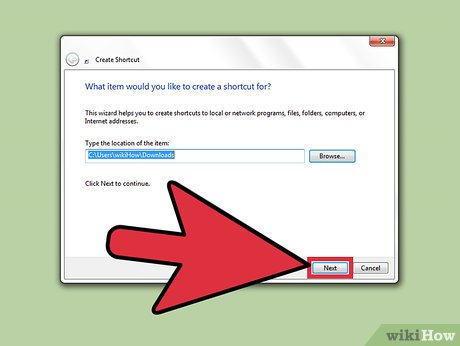
3Click Next option present somewhere at the right-bottom of the working window.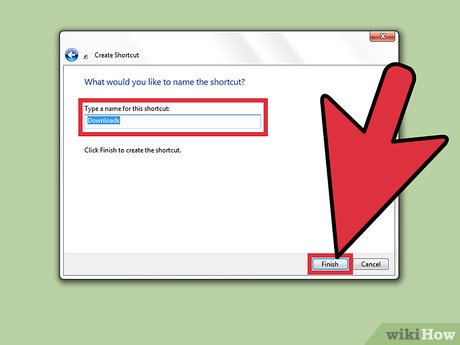
4Type a name for the shortcut. If a Finish button appears at the bottom of the dialog box, click it. If a Next button appears at the bottom of the dialog box, click it, choose the icon you want to use for your shortcut, and then click Finish.Method 2Method 2 of 2:Using the File Location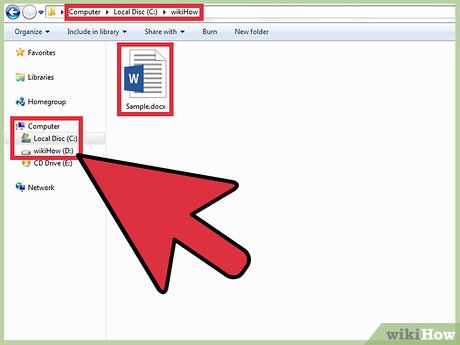
1 Locate the file or application for which you want to create the shortcut.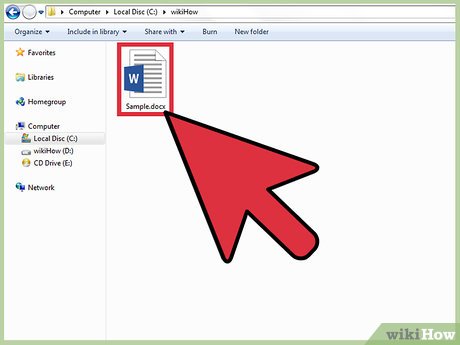
2Right click on that particular file or application for which you want to create the shortcut. Make sure to select the file before right-clicking.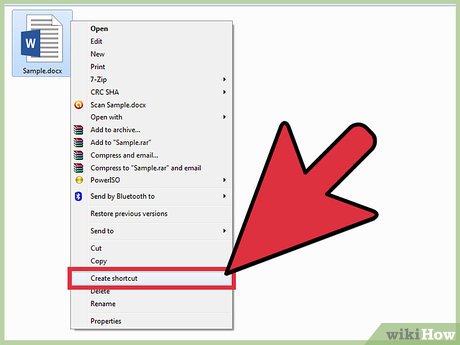
3Look for a dialog box. From there, choose the “‘Create Shortcut'” option.The shortcut is now at the end of the Programs list. For example, if you created a shortcut to Microsoft Word, the program will be present at the end of the list.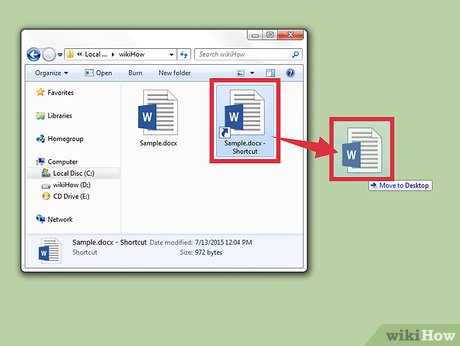
4Drag the shortcut to the desktop. You can now easily access your application with just a click.


