
This wikiHow teaches you how to change your mouse sensitivity in Windows 7 or higher. You can easily change your mouse sensitivity settings using the Control Panel.
Steps 1Click the Windows Start menu
  . It’s the icon with the Windows logo. By default, it is in the lower-left corner of the screen. Clicking this icon displays the Windows Start menu.
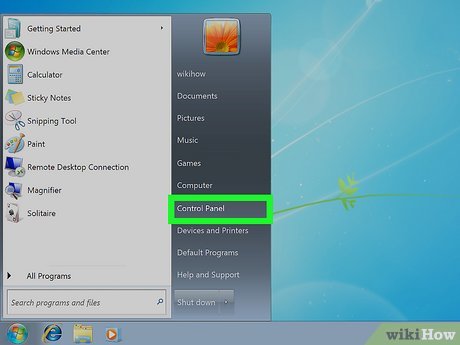
2Click Control Panel. It’s in the Windows Start menu. It’s in the panel to the right and near the bottom.If you are using a newer version of Windows, such as Windows 10/11, simply type “Control Panel” to display the Control Panel in the Windows Start menu.Advertisement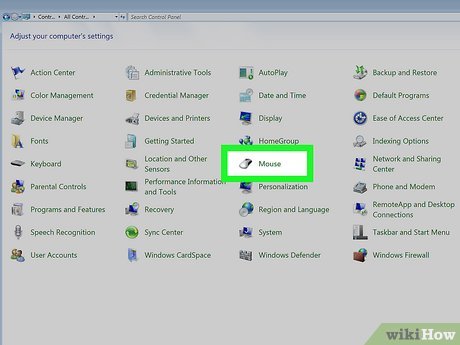
3Click Mouse. It’s next to an icon that resembles a mouse in the Control Panel. This opens the Mouse Properties menuIf you don’t see the “Mouse” option, click the drop-down menu next to “View by” in the upper-right corner and select “Small icons” or “Large Icons.” Alternatively, you can type “Mouse” in the search bar at the top.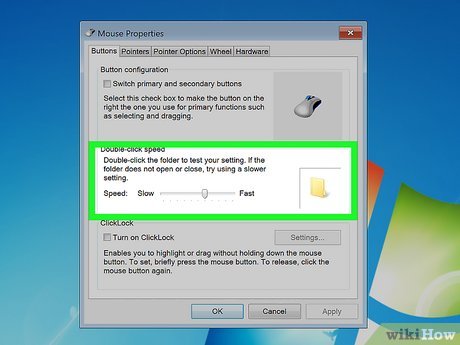
4Adjust the double-click speed. Use the slider bar below “Double-click speed” to adjust how fast you need to double-click your mouse for it to register as a double-click. Click and drag the slider to the right to make it faster. Click and drag it to the left to make it slower.To test the double-click speed, double-click the folder icon to the left of the slider bar. It should open. If the folder icon does not open, click and drag the slider bar to the left to lower the double-click speed.[1]XResearch source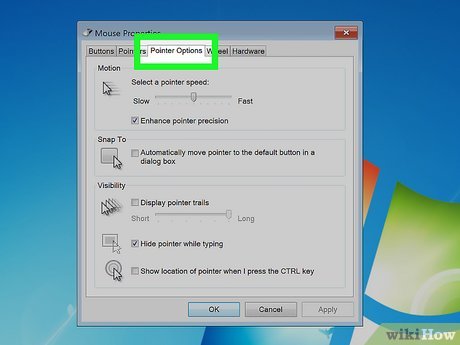
5Click the Pointer Options tab. It’s the third tab in the middle at the top of the Mouse Properties window. This displays the mouse pointer options.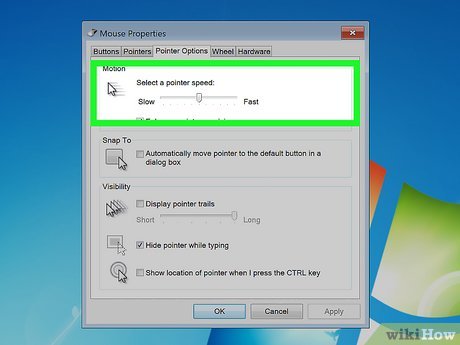
6Adjust the mouse pointer speed. Use the drop-down menu below “Select a pointer speed” to select how fast you want your mouse pointer to move. Click and drag the slider to the left to make it move slower. Click and drag it to the right to make it move faster. You should see your most speed update in real-time.
7Check or uncheck “Enhanced pointer precision.” Enhanced pointer precision automatically adjusts your mouse pointer’s speed depending on how fast you move your mouse. This feature is enabled by default. Click the checkbox next to “Enhanced pointer precision” to disable this feature.When enhanced pointer precision is enabled, your mouse pointer will move further when you move your mouse faster. When enhanced pointer precision is disabled, your mouse pointer will move the same distance regardless how how fast you move your mouse.Enhanced pointer precision can be helpful or unhelpful depending on your situation. If you are using a $5 mouse that doesn’t have a very good sensor, enhanced pointer precision may be helpful. However, if you are using your mouse for gaming, enhanced pointer precision may be a liability because it can mess with your muscle memory.[2]XResearch source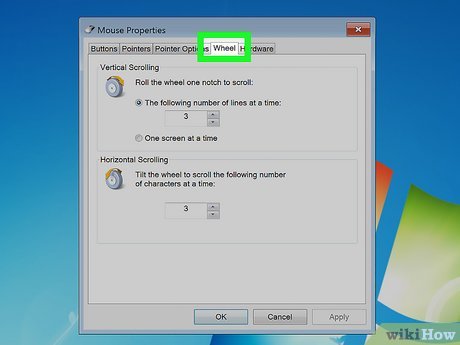
8Click the Wheel tab. It’s the fourth tab at the top of the Mouse Properties window. This menu allows you to adjust the mouse wheel settings.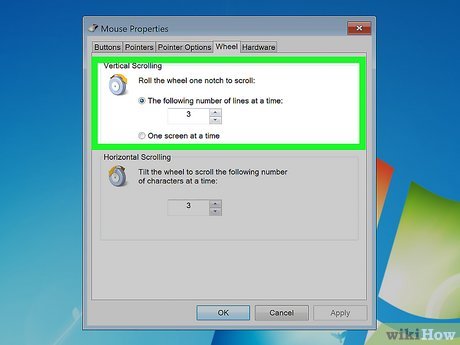
9Select how many lines you scroll vertically when using the mouse wheel. You can either type a number in the box below “Vertical scrolling” or click the arrow buttons to increase or decrease the number in the box. This determines how many lines you scroll vertically when you roll the mouse wheel one notch.Alternatively, you can click the radio option next to “One screen at a time” to scroll through an entire page using the mouse wheel.
10Select how many characters you want to scroll using horizontal scrolling. If you have a mouse that has a 4-way tilt wheel, you can select how many characters you want to scroll by tilting the wheel left and right. Enter a number in the box below “Horizontal scrolling” or click the arrow buttons to increase or decrease the number in the box.Not all mice support horizontal scrolling.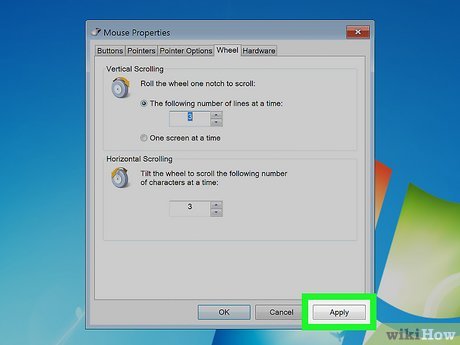
11Click Apply. This applies and saves your mouse sensitivity settings.[3]XTrustworthy SourceMicrosoft SupportTechnical support and product information from Microsoft.Go to sourceAdvertisement


