
A trailer is a type of cart that hitches to the back of a vehicle and is used to transport large items like furniture, lumber, landscaping equipment, and more. There are many trailer types, but a common dimension for everyday needs is 6 feet (1.8 m) by 4 feet (1.2 m). This is sturdy enough for most household items but too small to haul vehicles. To build this trailer, construct the bed out of rectangular metal tubing from a hardware store. Weld these pieces together. Then build the cage and tailgate with metal pipe. Finally, install the axle and wheels to complete your trailer.
StepsPart 1Part 1 of 4:Constructing the Frame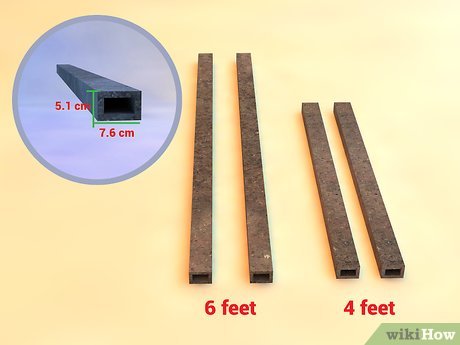
1Get four 2 in (5.1 cm) x 3 in (7.6 cm) pieces of rectangular steel tubing for the perimeter. The perimeter pieces are the 4 pieces of metal that form the rectangle for the trailer’s base. For this trailer, use 2 length pieces 6 feet (1.8 m) long and 2 width pieces 4 feet (1.2 m) long. Either buy 4 pieces cut to this length, or buy a longer piece and cut it to size yourself.XFor this trailer, you’ll need 20 feet (6.1 m), or 240 inches (610 cm), of steel total for the base. Buy enough to complete the job.If you’re building your trailer to different dimensions, then adjust this step to meet your needs.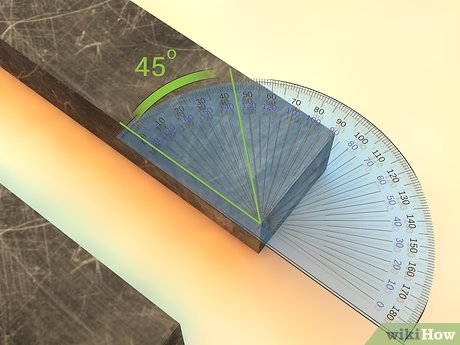
2Cut a 45-degree angle into the end of each perimeter piece. Use a protractor and measure a 45-degree angle into both sides of each perimeter piece. Make sure the angles on each base piece are facing the same direction. Then use a power saw or miter saw and cut the angle into each piece.XMiter saws are best to use here because you can adjust the saw to the angle you want to cut. This ensures you get a proper, 45-degree angle.Most power saws can cut metal, but be sure to use a blade designed for metal.Always wear goggles and gloves when cutting metal. A welding mask would be even better, because cutting metal produces sparks.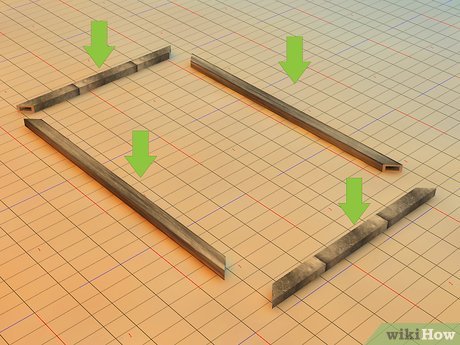
3Arrange the base pieces on a flat surface. Once the angles are cut, lay out the trailer perimeter. Work on a flat surface, like your driveway or garage floor. Lay out one of the 6 ft (1.8 m) pieces. Then fit a 4 ft (1.2 m) piece into each corner. Lay down the last 6 ft (1.8 m) piece to complete the rectangle.XPush the pieces together so there is as little space between them as possible.If you aren’t sure if you’re working on a flat surface, put a level on the floor and check.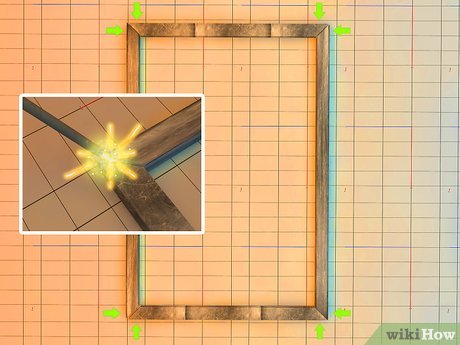
4Weld the perimeter pieces together. With the perimeter formed, fasten the pieces together. Use a blowtorch or similar welding tool and weld along the corners of the rectangle. Weld all the areas you can reach first. Then let the metal cool down and flip it over so you can reach the bottom.XMake sure there are no openings or holes in your weld spots. This keeps water out and prevents rusting.You can rent welding equipment from hardware stores, or buy it if you prefer.Wear a welding mask, thick gloves, and a leather apron while you weld. Never touch metal right after you welded it. Wait for everything to cool down first.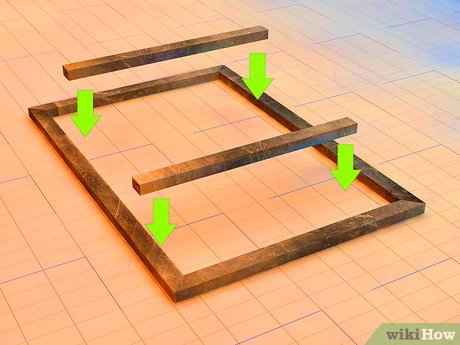
5Cut a support beam for the center of the trailer bed. Use the same type of steel beams you used for the perimeter. Measure the width between the 2 longer sections of the perimeter. Then cut a piece of steel to that length. Fit it in between the length pieces to make sure it fits snuggly.XDon’t worry if it’s a tight fit or if you have to press the piece in. It should fit tight so it welds better.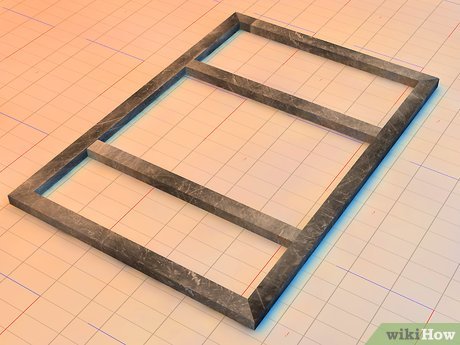
6Weld the support beam at the halfway point of the trailer length. Measure the trailer lengthwise and find the halfway point. Mark this off with chalk. Then fit the support beam into this spot and weld it in place.XPart 2Part 2 of 4:Attaching the Trailer Tongue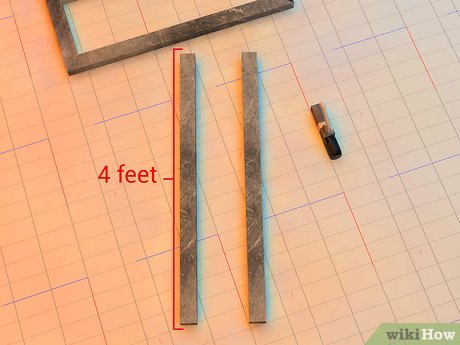
1Cut a 4.5 ft (1.4 m) piece of metal for the tongue. The tongue is the piece of metal that attaches to your car. Take the same type of steel you used for the perimeter and cut it to 4.5 ft (1.4 m).X4.5 feet (1.4 m) is a standard tongue size for an average trailer and towing vehicle. A general rule of thumb is that the tongue should be 1/2 the length of the towing vehicle plus 1 foot (0.30 m) to ensure it has clearance when you turn.If your tongue is longer than 5 ft (1.5 m), it needs extra reinforcing to stay stable.
2Make a notch in the tongue and rear support beam so they fit over each other. These notches fit the tongue and support beam together. Measure the distance from the middle support beam to the outer beam at the back of the trailer. Then measure this same distance on the tongue and mark it. Cut out a section the same width as the support beam halfway up the tongue at this point. Then measure the support beam and find its midpoint. Cut a notch there the same width as the tongue halfway down the beam.XFor this step, a portable power saw is easier than a miter saw.
3Fit the two notches together. Take the tongue notch and slide it into the beam notch. Make sure the tongue rests level on the ground and reaches the middle support beam.XConfirm that the tongue is in the center by measuring from the 2 back corners of the trailer bed to the tip of the tongue. Those 2 measurements should be equal, which confirms that the tongue is centered.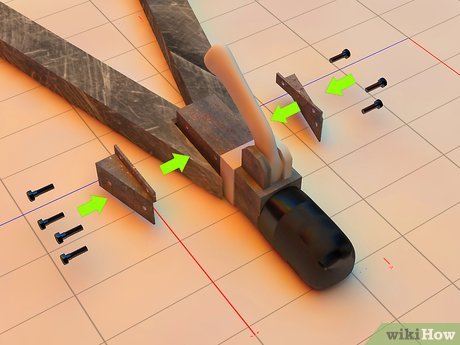
4Weld the tongue to the trailer bed. There are 2 points of connection between the tongue and the trailer bed. First is the middle support beam, where the end of the tongue reaches. Second is the notch on the back beam. Weld both locations so the tongue is attached.X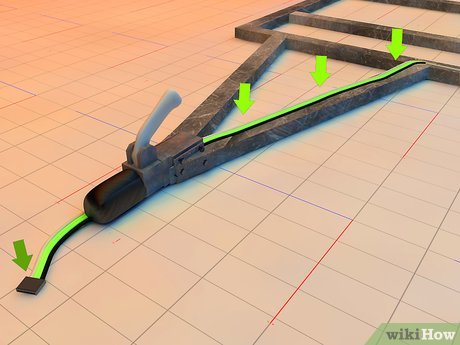
5Attach the hitch connection to the end of the tongue. Complete the tongue with a hitch connection. This is where the trailer attaches to your car. Get a hitch connector that fits into your car hitch. Then fit it onto the end of the tongue and weld it on.XHitch connectors are available from automotive stores. Make sure you get one that is the same width as the tongue.Some hitch connectors have holes for bolts. In this case, fit the connector onto the end of the tongue. Then drill through the bolt holes to make holes in the tongue. Screw the bolts in and then weld the end of the connector to the tongue.Part 3Part 3 of 4:Building the Cage and Tailgate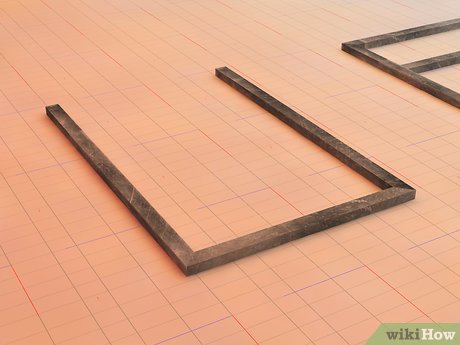
1Construct a cage top the same size as the trailer perimeter out of metal pipe. This cage top is the same size as the trailer bed, except it only has 3 sides. Get metal pipes that are 1 inch (2.5 cm) in diameter. Take 2 pieces of 6 ft (1.8 m) pipe and 1 piece of 4 ft (1.2 m) pipe. Place the 2 longer pipes on a flat surface parallel to each other. Lay the shorter pipe between them at one side, making a 3-sided rectangle. Then weld the corners together.XStandard metal tubing will work for this cage top.If the pipes aren’t the correct size when you buy them, measure and cut the pipes to the correct size.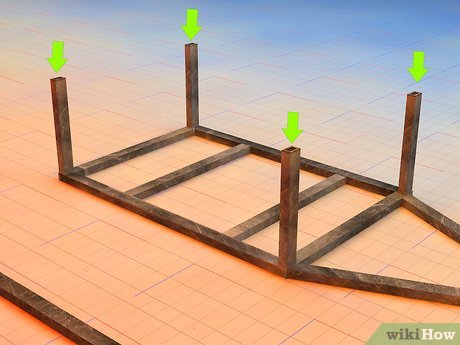
2Weld vertical metal pipes to each corner of the trailer bed. These form the support beams for the cage top. Cut 4 pieces of metal tubing to 2 feet (0.61 m). Then weld each one to the corner of the bed.XThe height depends on what you plan on hauling. 2 feet (0.61 m) covers most general needs. If you’ll be piling up a lot of material into the trailer, then you might need a taller cage.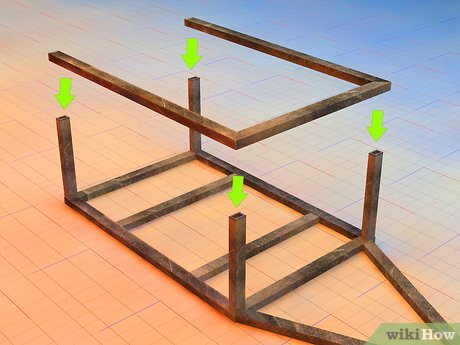
3Attach the cage top to the metal pipes. Once the cage top is complete, lift it into position. Leave the open side on the opposite side from the trailer tongue. Rest it on top of the support beams and weld it into place.XHaving someone else help lift the cage top and hold it in place while you weld makes this part much easier.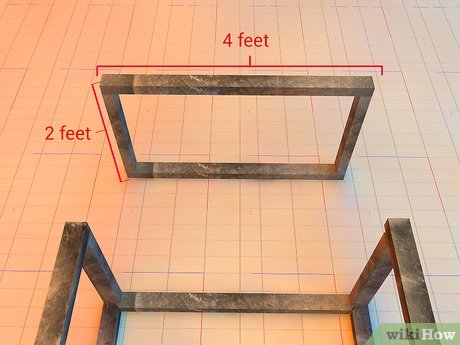
4Build a trailer tailgate out of metal tubing. Use the same tubing you used for the cage. Cut 2 of them to be 4 ft (1.2 m) and 2 to be 2 ft (0.61 m) long. Lay the 2 longer pipes out parallel to each other. Then place 1 shorter pipe at each end to make a rectangle. Weld the corners together. Then weld metal mesh over the open section.XFor an easier job, you can also make the tailgate out of a single piece of metal. This will be heavy, however.Metal mesh is available at hardware stores or scrapyards.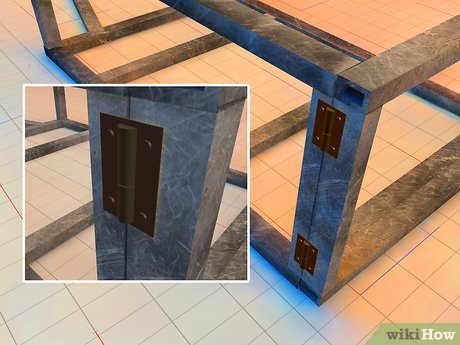
5Fasten the tailgate to the trailer with door hinges. Take 2 normal door hinges. Measure 6 inches (15 cm) in from each side on the bottom of the trailer and mark these 2 points. Weld a hinge on each point. Then weld the bottom of the tailgate to each hinge.XTo close the tailgate you have several options. For a simple solution, wrap a chain around the gate and bar to keep it closed.You could also attach connectors to the gate and trailer bed. Get 4 circular metal loops from the hardware store. Weld 2 onto the top corner of the cage facing backward. Weld the other 2 onto the outer top edge of the tailgate, facing outward. Then close the gate so the loops line up and drop pins into them to keep it closed.
6Cover the bed and sides with metal mesh. Finally, complete the trailer bed by covering it with metal mesh. Cut a sheet of mesh to the size of the base and roll it out. Attach it by welding down each point of the mesh that touches the trailer bed. Cut more sheets to fit each side of the bed as well, then attach them with the same welding process.XSome prefer to use plywood for the base of the trailer because it’s cheaper and lighter. If you won’t be carrying heavy loads, then lay plywood down for the trailer base.Part 4Part 4 of 4:Installing the Axle and Wheels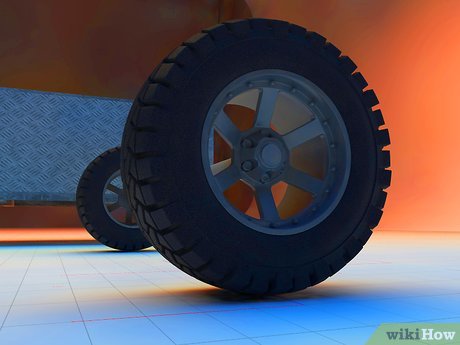
1Get an axle kit from a hardware store. For the wheels of your trailer, use good-quality axles. Kits are available from hardware stores that include the axle and tire attachments. Get a kit that fits the dimensions of your trailer.XSome also use old car axles for a cheaper option. If you prefer this option, check around at scrap yards for extra parts.Remember that car axles and tires will be heavier than trailer parts.
2Place the axle 28.8 inches (73 cm) from the back of the bed. For single-axle trailers, building recommendations say to place 60% of the trailer length in front of the axle and 40% behind it. This provides an ideal balance. For a 6 ft (1.8 m) trailer, place the axle 28.8 inches (73 cm) from the back of the bed.XFor a trailer of a different length, multiply its total length by 0.4. The result is the distance to place the axle from the rear of the trailer.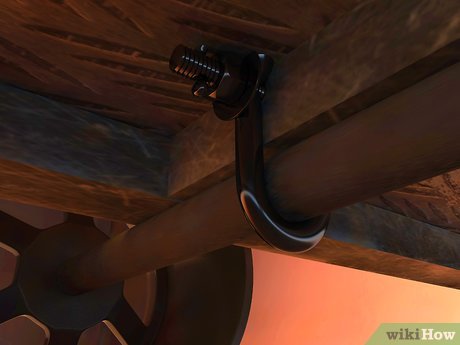
3Weld the axle clasps to the bottom of the trailer bed. Each side of the axle has 2 clasps that hold it in place. Press these clasps against the trailer beam and weld them down.XIf the clasps won’t stay in place, clamp them down while you weld.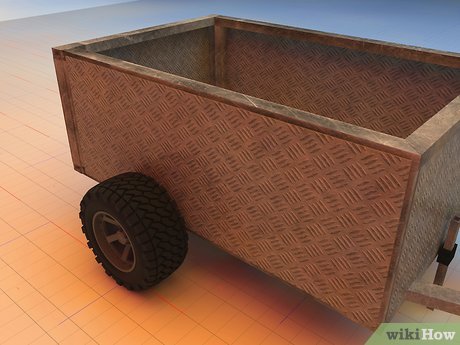
4Attach and fill the tires. Finally, complete the trailer by attaching the tires. Slip the rubber onto the wheel. Then use an air compressor and fill the tires to their recommended pressure.XThe recommendation for most trailer tires if 35-40 psi, but check the specifications on your product.If you aren’t sure how to install and fill the tires properly, let a professional do it so your trailer is safe.


